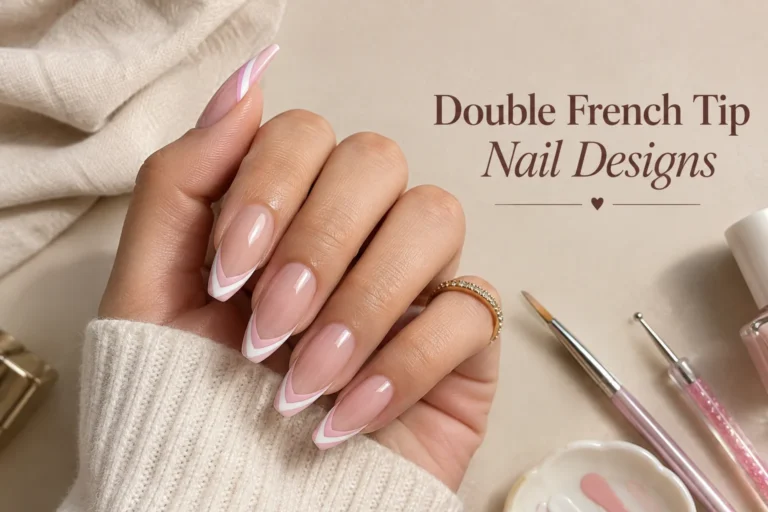
Easter is a great time to try a new manicure. Soft colors, cute patterns, and small, fun details make this season easy to enjoy on your nails. If you like changing your nail look with each season, these Easter nail design ideas are perfect. You get soft pastel colors, tiny flowers, gentle textures, and sweet little details you can copy at home. This list works for brunch, church, or just a family get-together. Pick a simple idea or a detailed one. Either way, you’ll find something that fits your style.
1. Soft Pastel Ombre
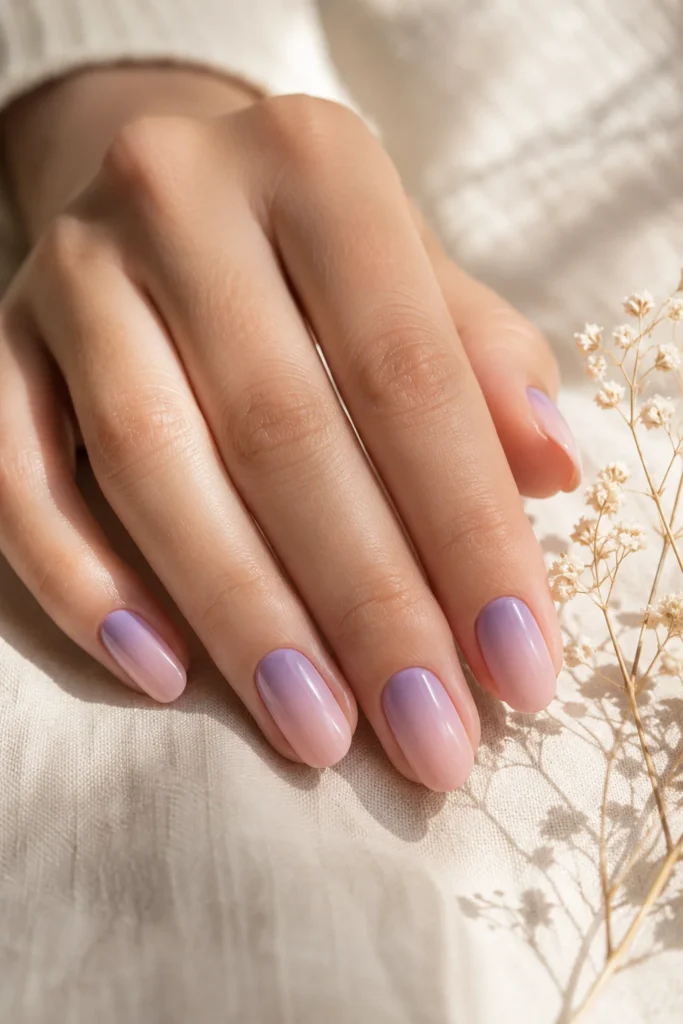
This look blends two soft colors on one nail. Think lavender fading into blush pink. Or mint fading into butter yellow. It looks pretty, but it’s not hard to make.
Paint the lighter color first. Let it dry a bit. Then dab the second color near the tip with a makeup sponge. Blend where the two colors meet. This works on short or long nails. Add a glossy or matte topcoat when you’re done.
Pro Tip: Put your polish in the fridge for a few minutes first. Cold polish blends more smoothly with a sponge.
Ombre Blending Steps
Base Color
Sponge Blend
Tip Shade
Blend edges gently for a smooth fade
2. Delicate Eggshell Cracks
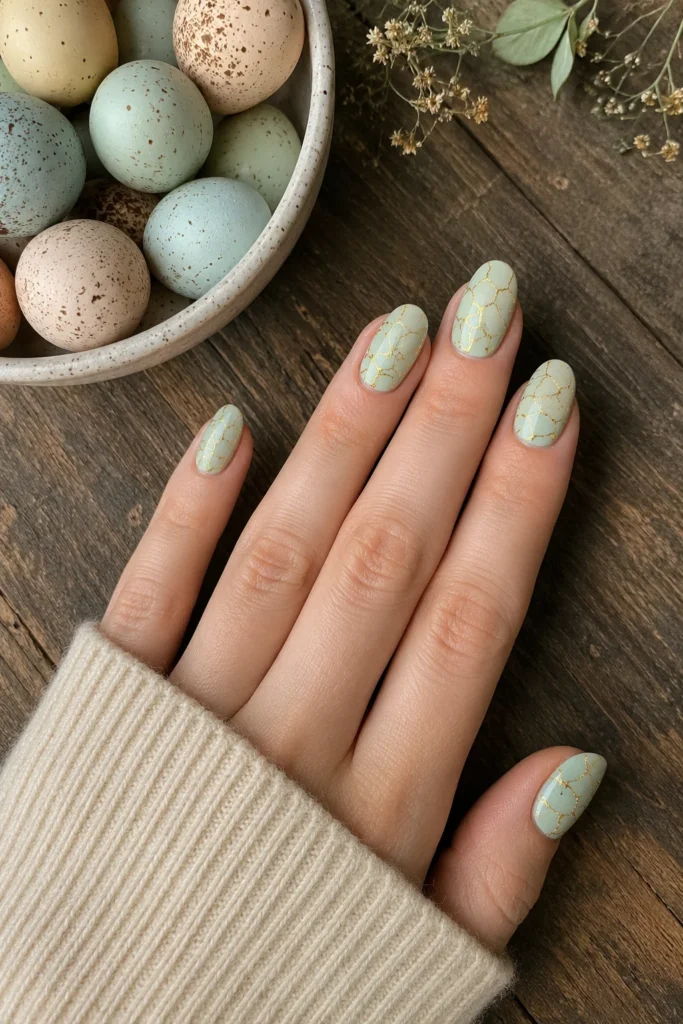
This design copies the tiny cracks you see on a pastel egg. Thin lines run across the nail instead of one flat color. It gives your nail some texture and a fun, artsy feel.
Start with a light pastel base coat. Let it dry. Then use a thin nail art brush with white or gold polish. Draw thin, uneven lines like real cracks. Don’t make them straight or matching. Real cracks are never perfect. Finish with a matte topcoat for a chalky look.
Pro Tip: Practice your crack lines on paper first. This helps your hand get used to drawing thin, light strokes.
Do’s and Don’ts
| ✓ Do | ✗ Don’t |
| Make lines uneven and natural | Draw straight, perfect lines |
| Let the base dry all the way | Rush the drying step |
| Use a matte topcoat | Press too hard with the brush |
3. Mini Bunny Silhouettes
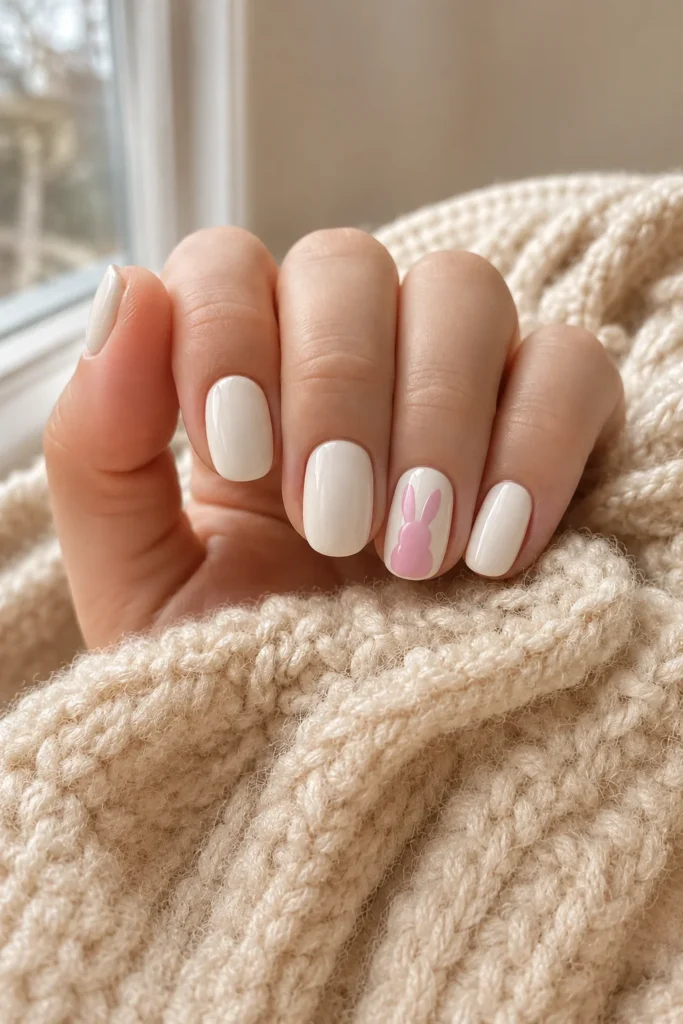
A tiny bunny shape on one nail adds a fun touch. You don’t have to draw it on every finger. Just one or two nails are enough to make the whole look feel special.
Paint the accent nail cream or white. Use a dotting tool to make a round head with two tall ears in a pastel color. Add one small pink dot for the nose. Keep the other nails one plain pastel shade so the bunny nail stands out.
Pro Tip: A small dotting tool works better than a brush. It gives you rounder, more even bunny shapes.
Bunny Nail Steps
Paint the nail cream or white
Dot a round head shape
Add two tall ears
Add a tiny pink nose
4. Speckled Robin’s Egg Nails
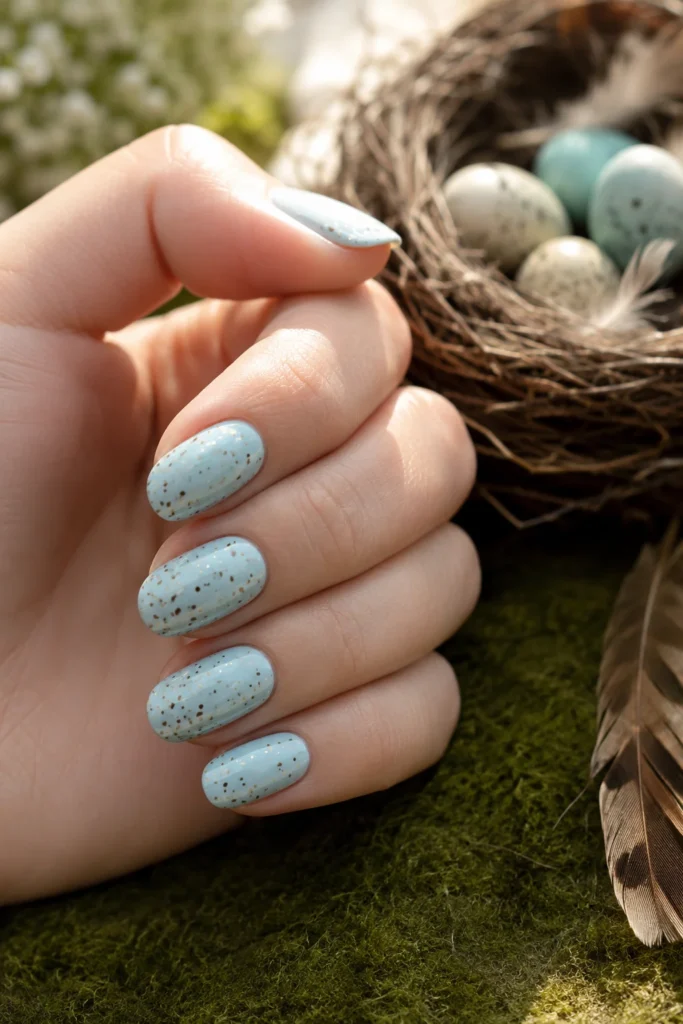
This look copies the soft blue of a robin’s egg. Small brown or gold speckles cover the nail. It looks natural and a little wild, like something you’d find outside.
Paint each nail pale blue and let it dry all the way. Dip an old toothbrush into brown or gold polish. Flick the bristles gently over each nail. This makes small speckled dots. Put tape around your fingers first so polish doesn’t land on your skin.
Pro Tip: Try the speckle trick on a spare nail tip first. This lets you see how light or heavy you want the dots.
What You’ll Need
- 🎨 Pale blue polish
- 🟤 Brown or gold polish
- 🪥 Old soft toothbrush
- 🩹 Tape for your skin
5. Pastel French Tips
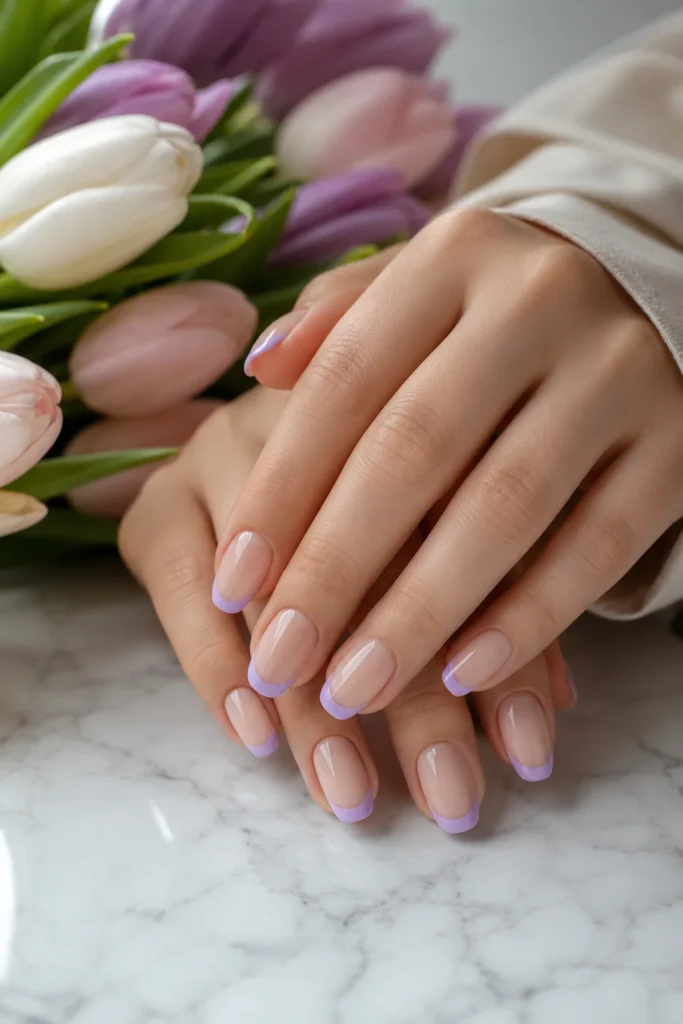
This is a soft update on the classic French manicure. Instead of a white tip, use lilac, peach, or mint green. You still get that clean, classic look, but with a fresh spring twist.
Paint a sheer nude or pale pink base on the whole nail. Then use a thin brush to paint a curved tip line in your pastel color. Keep the line smooth. Try to make it match across all ten nails.
Pro Tip: If your hand shakes a little, use nail guide stickers. They help you paint a clean, curved line every time.
Pastel Tip Color Options
Lilac
Peach
Mint
6. Floral Accent Nail
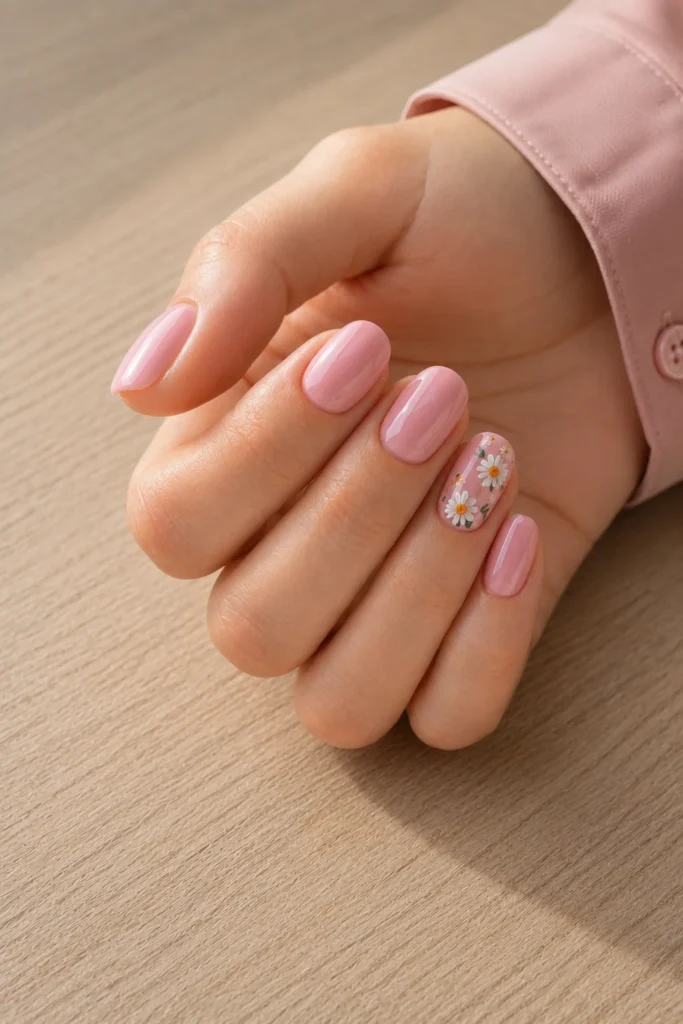
One flower nail can make a whole manicure feel special. You just paint one nail, usually the ring finger, and keep the rest simple.
Paint the accent nail a soft pastel color. Use a fine brush to dot three or four small flowers. Add a tiny yellow or gold dot in the middle of each flower. Finish with a few thin green leaf strokes.
- Keep petals small and round
- Use only two or three colors per flower
- Add leaves last so you don’t smudge the petals
Floral Nail Checklist
☑ Base coat dry
☑ Petals dotted on
☑ Flower centers added
☑ Leaf strokes painted
☑ Topcoat sealed
7. Gingham Pattern Nails
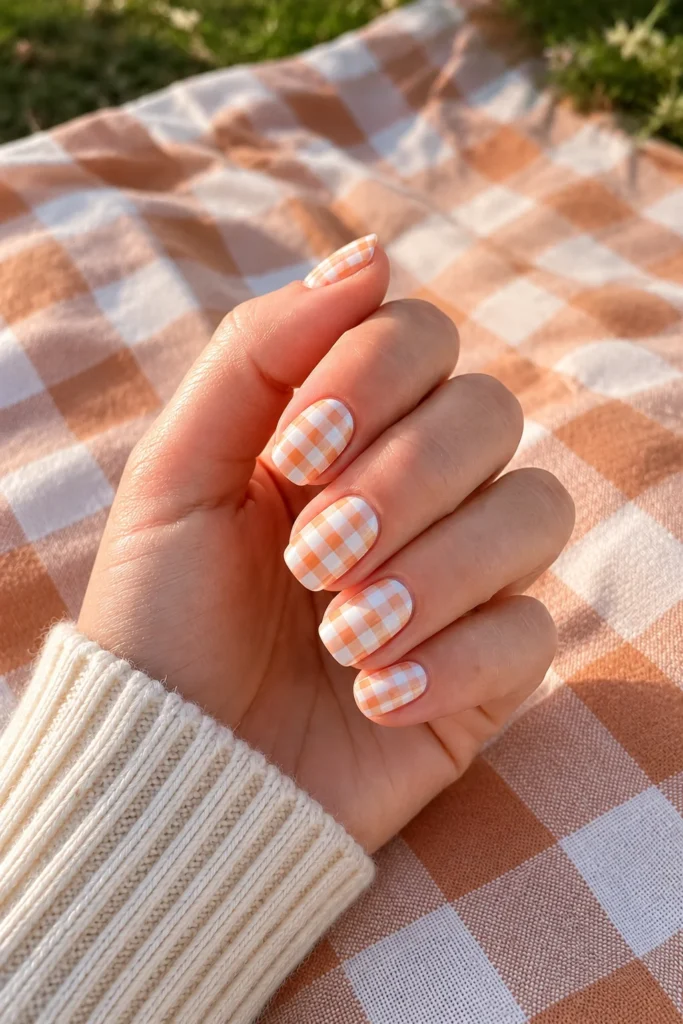
Gingham nails look like a picnic blanket. The crisscross lines feel playful and fun. Soft yellow, pink, or blue over white looks best for this design.
Paint a white base coat first. Once it’s dry, use a thin brush to paint even horizontal lines in your pastel color. Then paint vertical lines over them. Where the lines cross, the color looks a bit darker. That’s the classic gingham look.
Pro Tip: Use small dots as guides before you paint your lines. This keeps the pattern even, even on the curved part of your nail.
Pattern Layers
White Base
Horizontal Lines
Crossed Grid
8. Chrome Pastel Finish
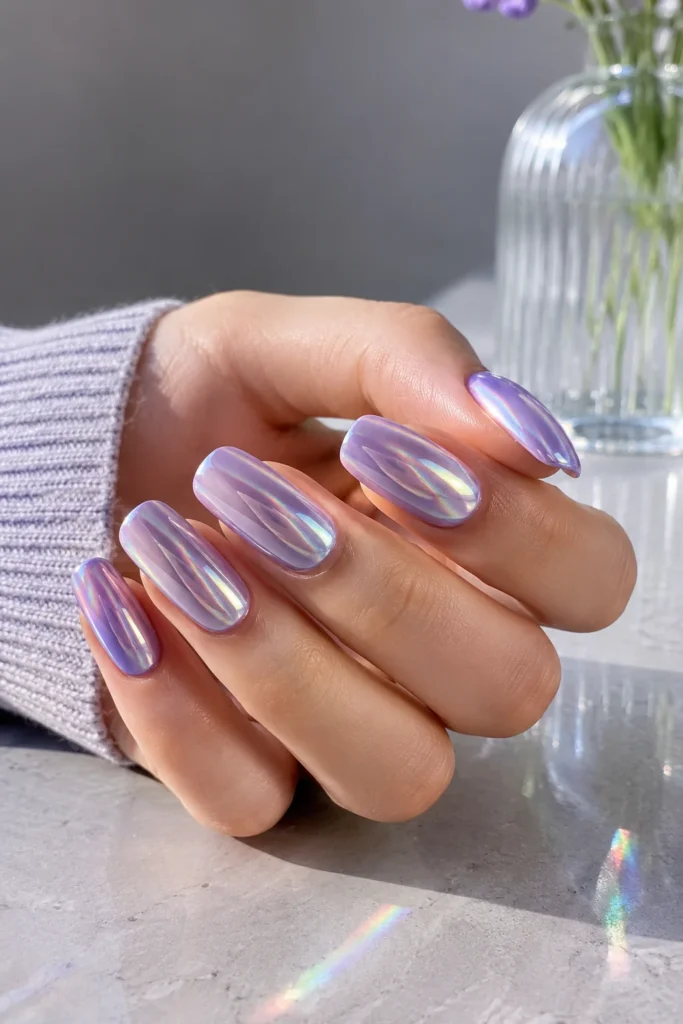
This design gives your nails a soft, shiny metal look. It’s a nice way to dress up a pastel color without picking a loud shade.
Apply a pastel gel base coat and cure it. Use a chrome powder tool to rub pastel chrome powder onto the nail. Rub in small circles until the nail looks smooth and shiny. Seal it with a glossy topcoat to protect the shine.
Pro Tip: Chrome powder shows every bump and line. Make sure your base coat is smooth before you add it.
Chrome vs Regular Pastel
| Feature | Chrome | Regular |
| Shine | Mirror-like | Normal gloss |
| Time to apply | Longer | Quicker |
| Best for | Special days | Everyday wear |
9. Easter Basket Weave Design
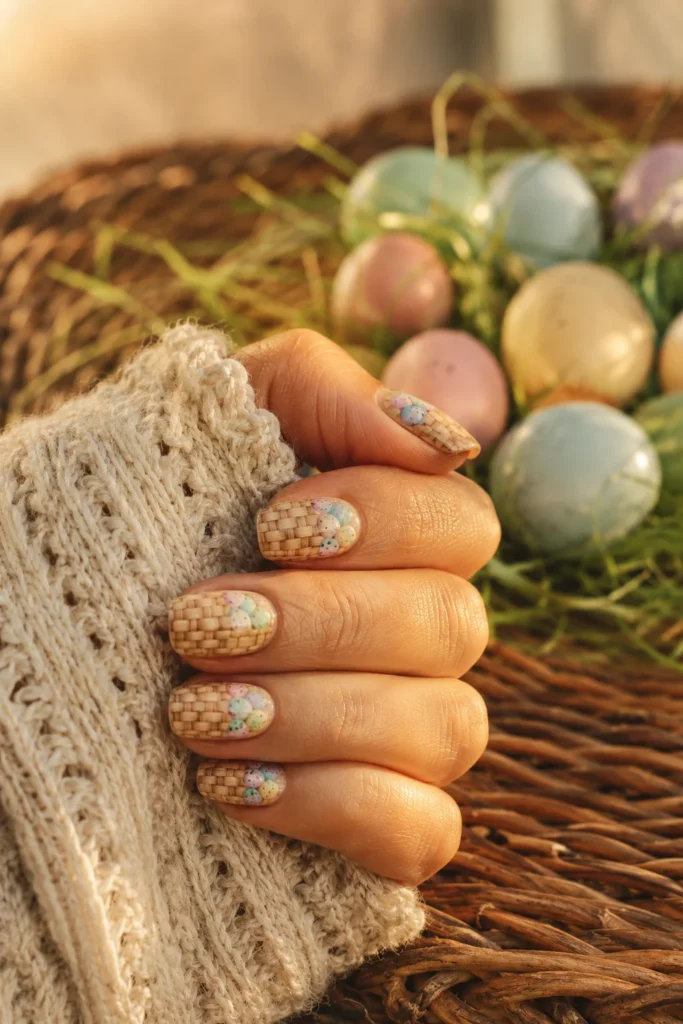
This design copies the woven look of a real Easter basket. It works best on longer nails, since you need more room to fit the weave pattern.
Paint a warm tan or light brown base coat. With a thin brush, paint horizontal and vertical lines in a darker or lighter shade. Cross them over each other like woven basket strands. Add a few small pastel dots near the top for eggs peeking out.
Pro Tip: Work on small parts of the nail at a time. Let each layer dry a little before adding the next, so your lines stay clean.
Weave Pattern Steps
Step 1: Paint tan base, let it dry
Step 2: Paint horizontal strands
Step 3: Cross with vertical strands
Step 4: Add small egg dots on top
10. Butterfly Accent Nails
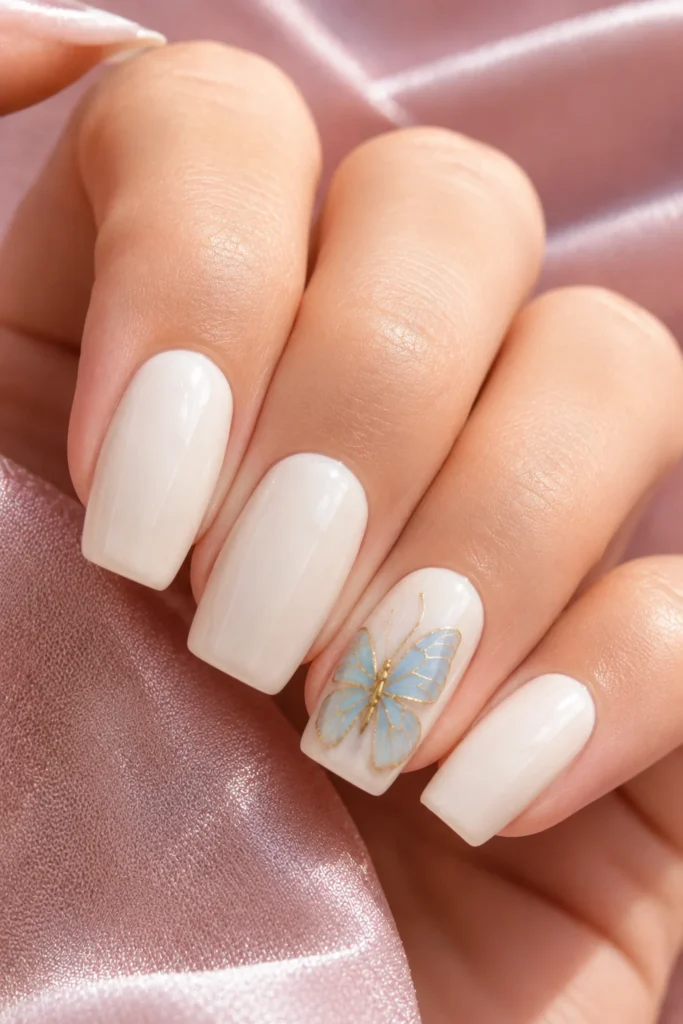
A small butterfly adds a light, fun touch to any manicure. This works well as one accent nail, or two if you want a bit more.
Paint the accent nail a pale color. Use a fine brush to paint two matching wings in a pastel shade. Draw a thin line down the middle for the body. Add a few small dots along the wing edges.
- Keep both wings the same shape
- Try a gold outline for extra shine
- Stick to one or two accent nails
Design Highlights
🦋
Matching Wings
✨
Gold Outline
🎨
Pastel Color
📍
1-2 Nails
11. Marbled Pastel Swirls
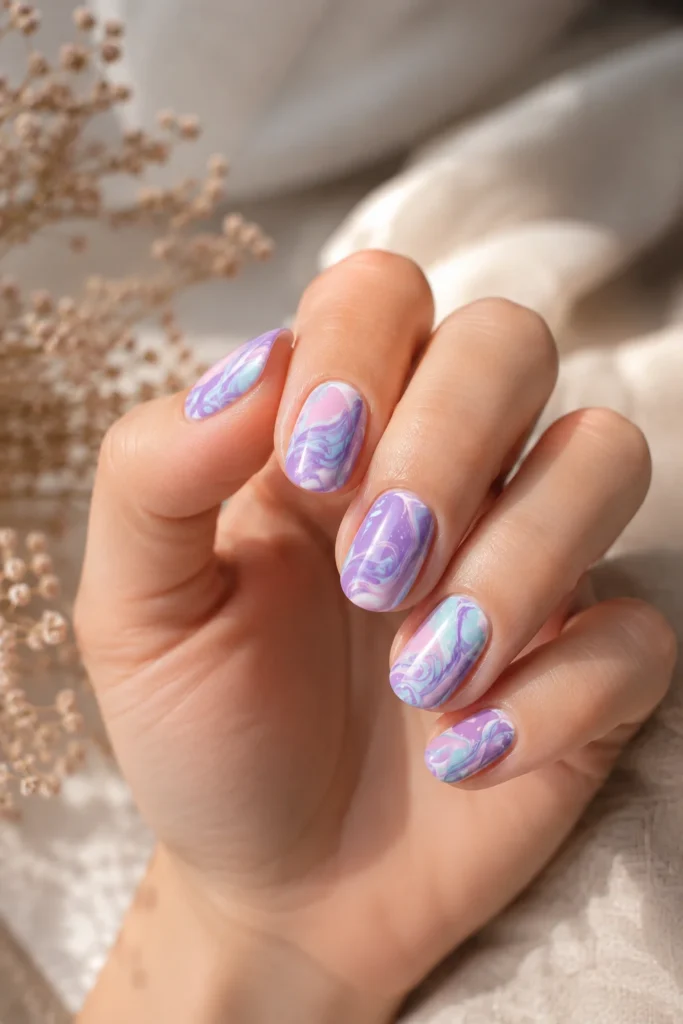
Marbled swirls give each nail its own flowing pattern. No two nails ever look the same, which makes this design feel special and one of a kind.
Fill a small cup with room temperature water. Drop two or three pastel polish colors onto the water, one at a time. Swirl them gently with a toothpick. Dip your nail into the pattern, then pull it straight out. Clean off any extra polish once it dries.
Pro Tip: Add one drop of polish at a time. Wait a few seconds before you swirl. Polish spreads fast on water.
Marbling Process
Drop colors
Swirl gently
Dip nail
12. Tiny Chick Silhouette
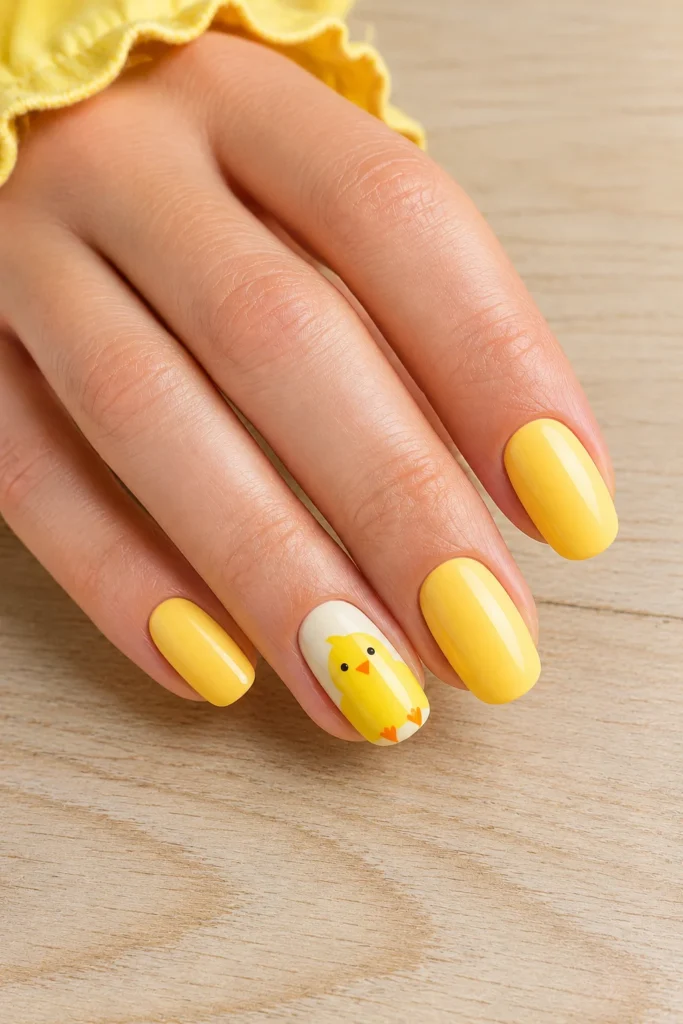
A tiny chick adds a sweet, simple touch. Kids love this one, and it’s an easy pick for a family brunch.
Paint the accent nail soft yellow. Use a dotting tool to add a small oval body in a slightly darker yellow. Add a tiny orange triangle for the beak. Add two small black dots for eyes. Keep every shape round, not sharp.
Pro Tip: Let the body dry for a minute before you add the beak and eyes. This keeps the small details clean.
Simple Steps
1. Paint soft yellow base
2. Dot a round body
3. Add a small orange beak
4. Add two eye dots
13. Polka Dot Easter Eggs
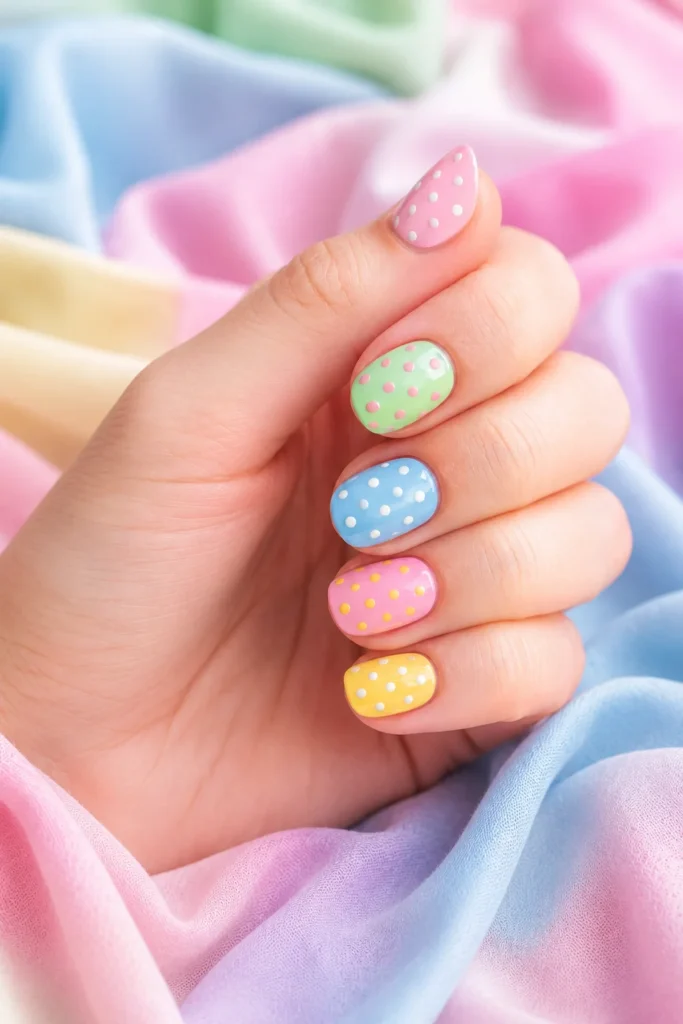
Polka dot nails look like little Easter eggs. This design is easy and reads as Easter right away, no extra work needed.
Paint each nail a different pastel color. Use a dotting tool to add small dots in a contrasting color on top. Mix up your dot sizes a little. This makes them look hand-painted instead of stiff and even.
- Use a different pastel on each finger
- Mix two dot sizes for a fun look
- Space your dots loosely, not in a tight grid
Egg Color Palette
14. Soft Lilac and Gold Accents
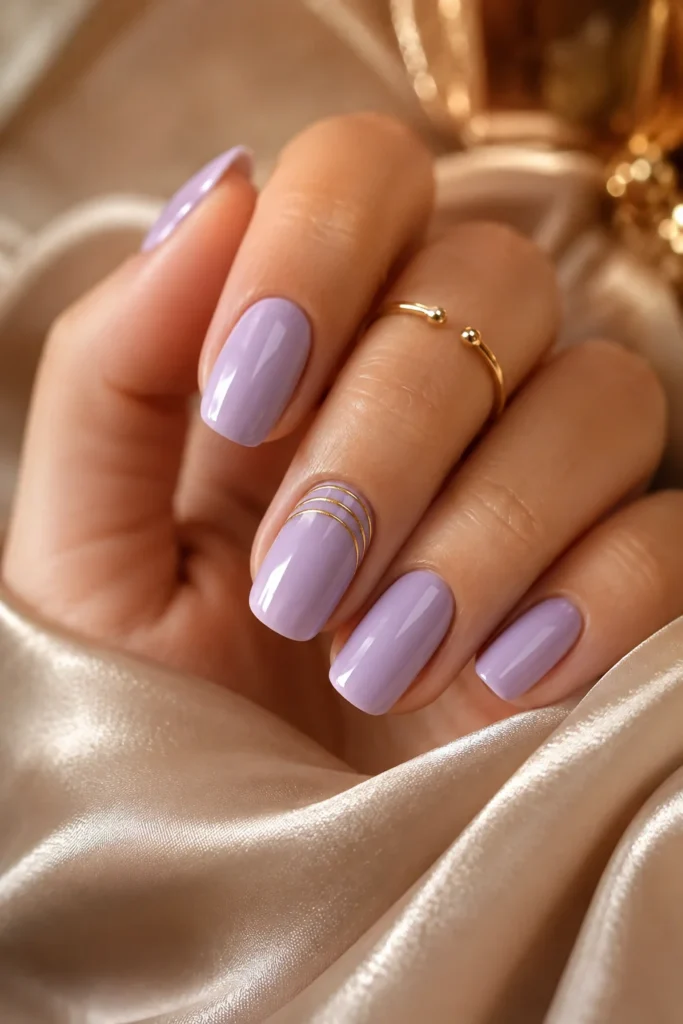
This look pairs a calm lilac color with small gold details. It feels dressy enough for a formal Easter brunch, but it’s still soft and easy on the eyes.
Paint all nails one solid lilac shade. On one or two accent nails, use a thin gold brush to add small lines, dots, or a small crescent shape near the cuticle. Finish with a shiny topcoat to bring out the gold.
Pro Tip: Gold striping tape is an easy shortcut if freehand lines feel too hard.
Accent Placement Ideas
15. Textured Sugar Finish
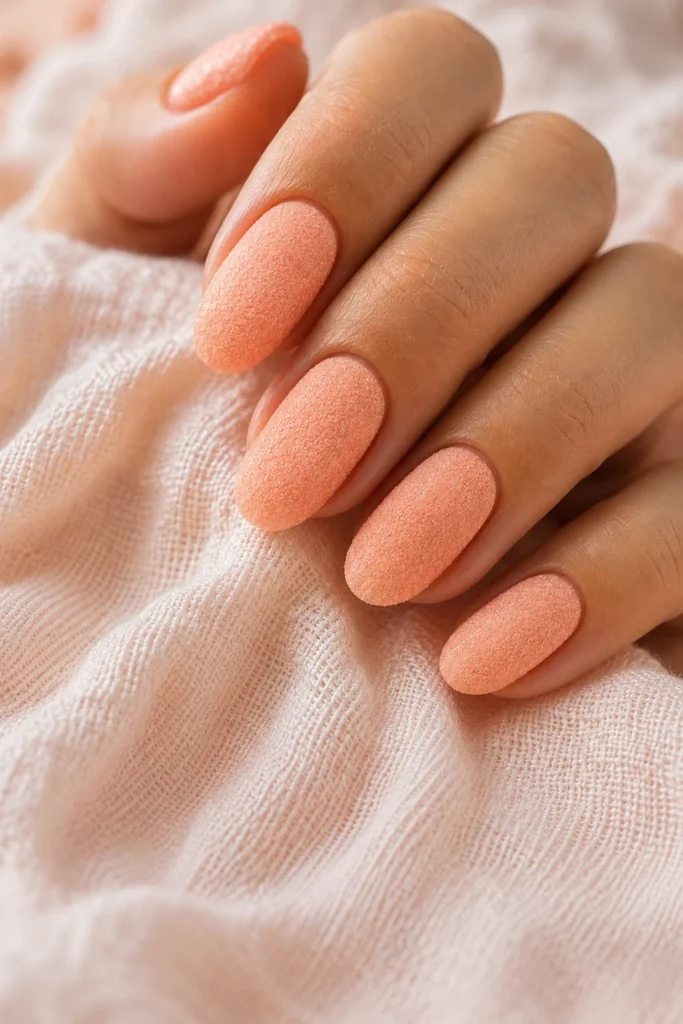
This look gives your nails a soft, matte, grainy feel, like sugar-coated candy. It stands out from a normal glossy manicure.
Paint a pastel base coat and let it dry all the way. While your topcoat is still a little sticky, dip your nail into fine sugar effect powder. Press gently so it sticks evenly. Don’t rub the surface, or you’ll mess up the texture.
Pro Tip: Do this over a small tray to catch loose powder and keep your space clean.
Texture Comparison
Sugar Matte
Regular Gloss
Final Thoughts
These Easter nail design ideas show you don’t need a hard design to make your nails feel festive. From soft pastel ombre to a sugar-textured finish, each idea gives you a new way to try spring on your nails. Some are simple. Some take more time. Either way, there’s something here for you. Pick the one that fits your style this Easter. Grab your polish, and enjoy making a manicure that feels both pretty and fun.