
A French manicure is really just a line placement, a lighter tip color set against a base. That’s it. Once you get that, you realize the “plain white tip on nude nail” version is only one option out of dozens, and most of the more interesting ones come down to changing the tip width, the tip color, the nail shape underneath it, or adding a small detail on top of the classic layout.
Acrylic is what makes most of these versions actually work. It cures hard rather than self-leveling like gel, so a sculpted line stays exactly where you placed it instead of settling or spreading slightly as it sets. That matters more than people expect once you get into thinner lines, split tips, or anything sculpted at length, where gel tends to lose crispness and natural nails often can’t hold the shape or length needed in the first place.
The Micro-French Tip
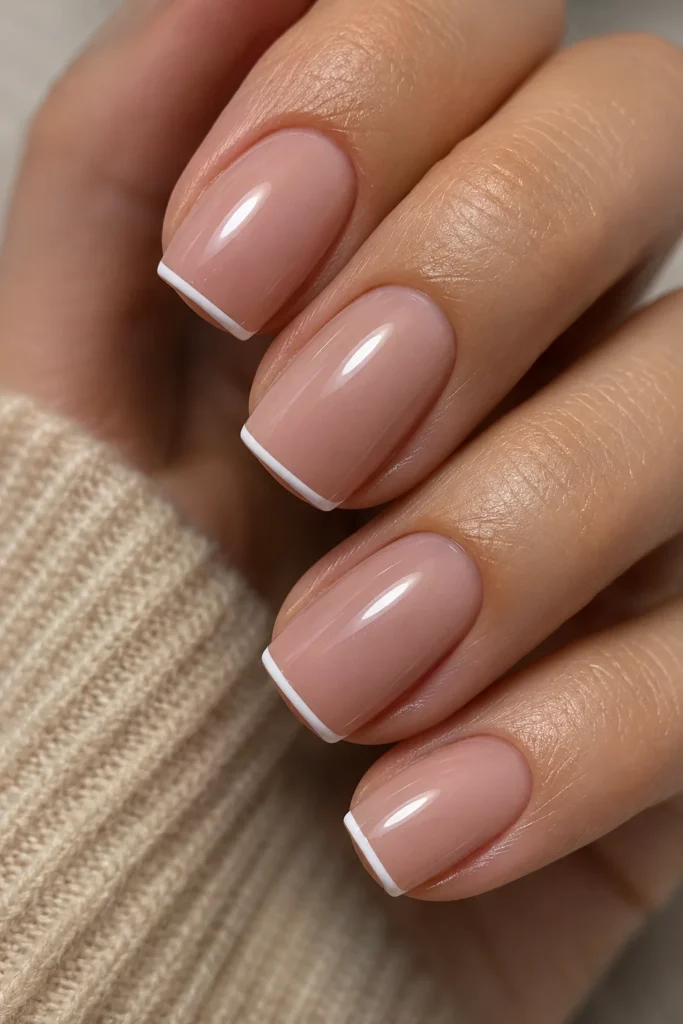
Instead of a tip line that covers a third of the nail, this pulls it down to a thin 1-2mm strip right at the free edge. It reads more modern and less “bridal,” especially on shorter or squarer nails where a wide traditional tip can look dated or overly formal. The catch is that a thin white line needs either a very steady freehand hand or striping tape, because sculpting the tip too thick will make it look chunky and clumsy instead of delicate, and there’s very little room to correct a wobble once the acrylic sets.
The Milky White Base French

Swap the classic pink or nude base for a sheer milky white acrylic, then keep the tip color solid white or off-white. The contrast is subtler than a traditional nude-and-white pairing, so it tends to sit better on cooler or fairer undertones where a stark white tip can look harsh against the skin. Acrylic holds that milky opacity evenly across the whole nail, which is harder to get consistent with a gel polish layer that can pool or streak near the cuticle.
Colored Tip French (Not White At All)
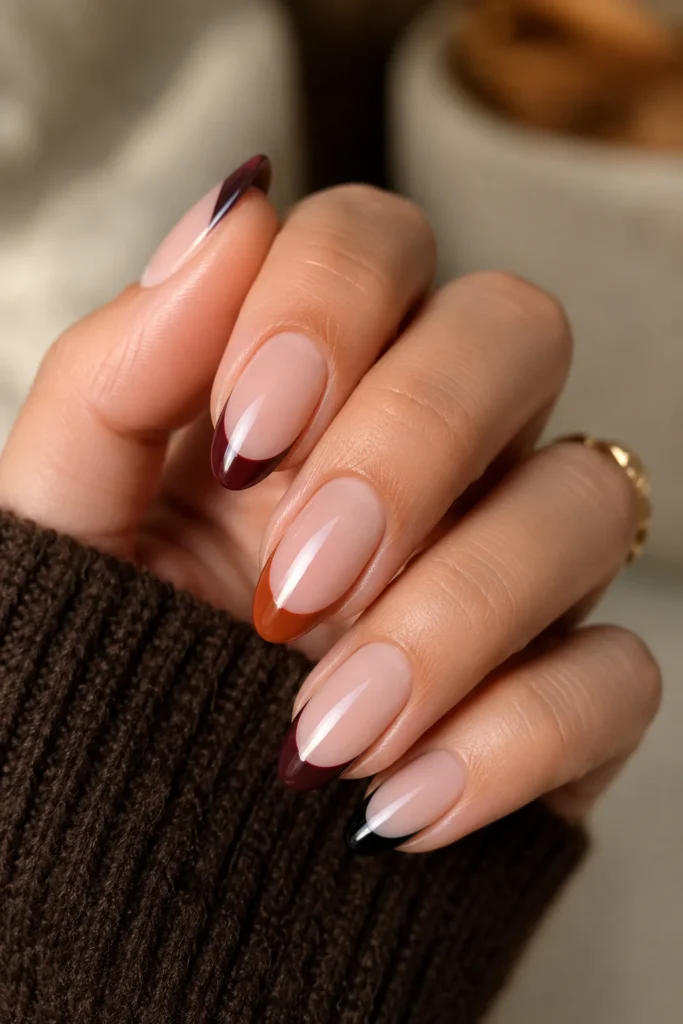
This keeps the classic tip shape and placement but swaps white for a solid color, terracotta, deep burgundy, even black. It still reads as “French” because the shape and placement are doing the work, not the color. The honest trade-off here is that colored tips show grow-out faster than a soft white or nude line, so you’re looking at a fill every two to three weeks if you want the line to stay crisp instead of visibly lifting.
Reverse French (Half-Moon at the Cuticle)
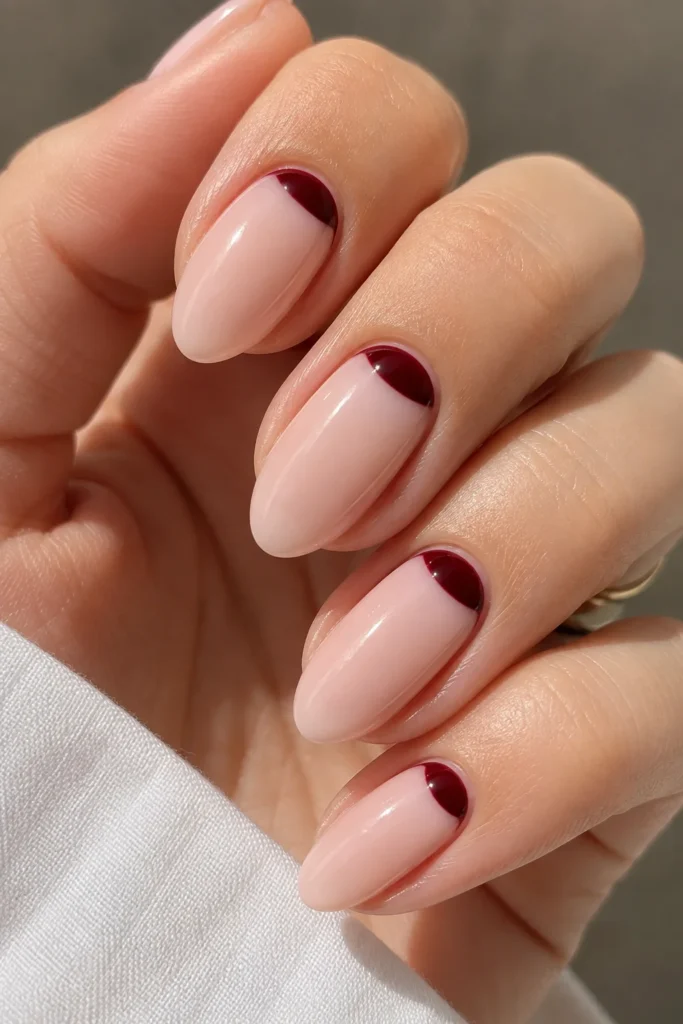
Flip the whole concept and put the contrasting color at the base of the nail instead of the tip, in a half-moon shape that follows your cuticle line. It’s one of the harder ones to sculpt cleanly because the curve has to match your actual cuticle shape, not a generic arc, or it looks off-center. Like colored tips, reverse French needs precise fills, since even a small amount of new growth throws off the whole half-moon shape.
Double French (Two Tip Lines)

One line at the free edge, a second thinner line sitting just above it in a different color or finish. This only really works with enough structural thickness to keep both lines visually separated and clean, which is exactly what acrylic application is good at since it doesn’t self-level the way gel does. On gel, that second line has a tendency to blur or thin out as the product settles before curing.
Chrome French Tip

A standard white or nude base with a chrome powder applied only to the tip, so the shine sits exactly where the traditional white would go. It photographs well because the metallic catches light differently than the matte base, but the technical note here is that chrome needs a very smooth acrylic surface underneath, any ridges or unevenness in the sculpt show up magnified once the chrome goes on.
Gold Foil Tip Line

Instead of painting the tip, a thin gold foil or gold leaf accent runs along the tip line itself, sometimes with a fine gold outline separating the base from the tip. It’s one of the more delicate options for anyone who wants their gold nail details without covering the whole nail in metallic. Foil adheres better to acrylic’s slightly tackier cured surface than it does to some gel top coats, which can be too slick to hold foil without a separate adhesive step.
Almond-Shaped French with a Curved Tip Line

On an almond shape, a straight tip line looks slightly wrong because the nail edge itself is curved, not flat. Following that curve with the tip line instead of fighting it makes the whole shape read more intentional. This is a common mistake people don’t think about until they see it side by side: a straight French line on an almond-shaped nail can look like an afterthought rather than a design choice.
Coffin-Shaped French with a Wider Tip

Coffin nails end in a flat edge instead of a point, and a thin tip line tends to disappear or look accidental against that squared-off edge. Going wider, sometimes 4-5mm instead of the usual 2-3mm, balances the geometry better. On coffin-shaped acrylics, that wider tip line also gives the sculptor more surface to work with when building apex strength near the free edge, which matters since coffin tips see more stress at that flat corner.
Ombre French (Blended, No Hard Line)

This softens the whole concept by blending the tip color into the base instead of using a defined line, usually with a makeup sponge technique during application. It’s more forgiving for anyone worried about a crooked line, since there’s no sharp edge to keep straight. Compared to a hard-edge classic French tip, ombre also grows out more gracefully, there’s no obvious demarcation line creeping toward the cuticle the way there is with a solid tip color.
French with a Single Accent Line

Keep the traditional white tip but add one thin contrasting line running just above it, gold, black, or a color that pulls from an outfit or occasion. It’s a small addition but it changes the whole read of the nail without turning it into a full nail art piece. From the chair, this is one of the easier upsells to explain to a client because it’s additive, you’re not redesigning the whole French concept, just accenting it.
Extra-Long Square French
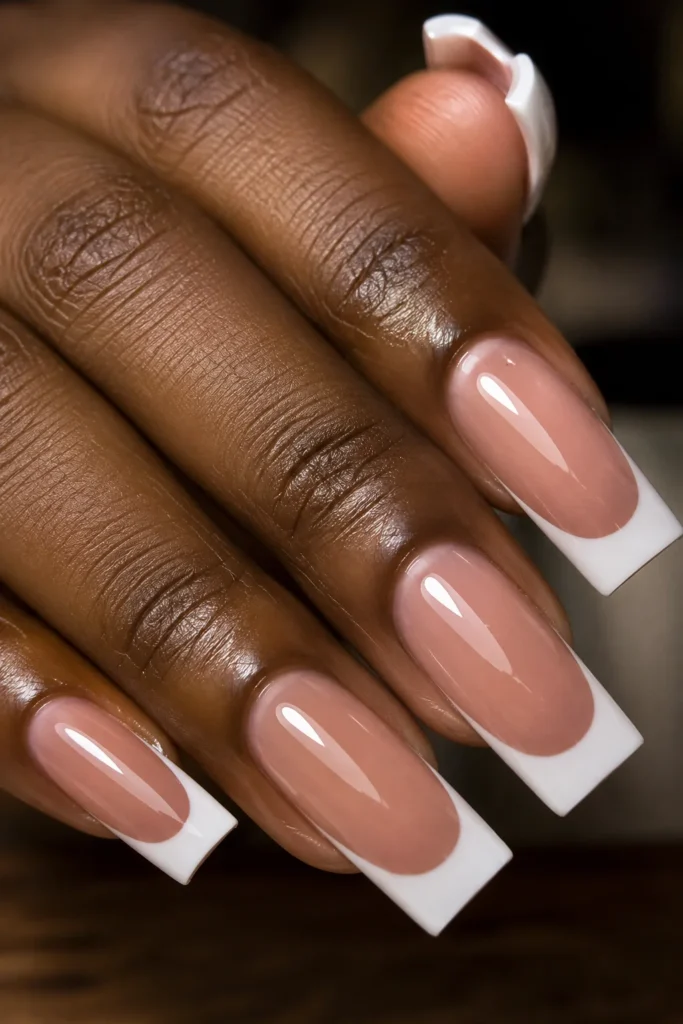
A longer square shape gives you more surface area for the tip, which means the classic straight-across French line actually has room to be proportionate instead of cramped. This only really holds up on acrylic length, since natural nails usually can’t grow evenly long enough to support a square shape without breaking at the corners first. The trade-off is lifestyle-dependent: square tips at length catch on things more than rounder shapes, so this isn’t the pick for someone who’s typing or doing manual work all day.
Two-Tone Split French

Instead of one tip color, the tip is split down the middle into two colors or finishes, matte on one half, glossy or metallic on the other, or two different shades entirely. It’s a more advanced application since the line separating the two tip colors has to stay as clean as the main French line itself. Sculpting on acrylic gives more working time to get that split precise before it sets, compared to gel where you’re racing the cure light.
Choosing Your Shape and Talking to Your Tech
Shorter or narrower nail beds usually read cleaner in almond or a soft square, since long coffin shapes can overwhelm a small bed. If you’re in water a lot or type all day, keep length moderate no matter the shape, since even acrylic has limits against constant friction.
When describing what you want, be specific: tip width in millimeters, the shape, the tip color or finish, and whether you want a hard line or something blended. That gives your tech a real starting point instead of a vague “just do a French.” And when it’s time to remove them, ask for a proper soak-off rather than filing them down dry, filing off the product usually takes a layer of your natural nail with it.


